Conversational Query with ChatGPT and Kinetica
Kinetica is a high-speed analytical database for big data. Its integration with ChatGPT allows you to havea sophisticated analytical conversation with your data in English no matter the scale. This post will show you how to set up and use this integration.
Step 1: Launch Kinetica
Kinetica offers a “free forever” managed version with 10 GB of storage that is hosted in the cloud. It takes about two minutes to launch and only requires an email address to sign up. You can access it through this link and follow the instructions to create an account and launch Kinetica.
Step 2: Open the Quick Start Guide Workbook and Load Taxi Trip Data
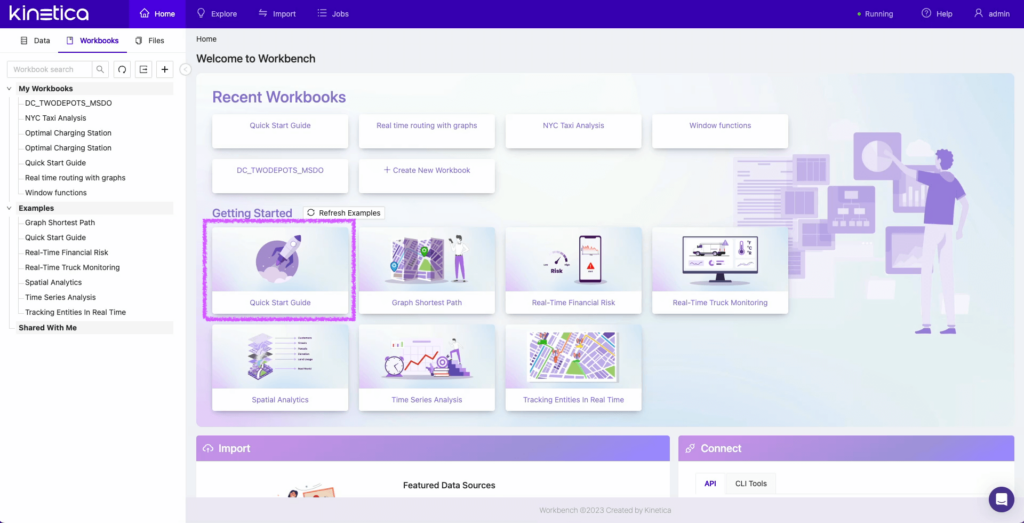
Workbench is Kinetica’s primary user interface for analysts, data scientists and data engineers. It helps you manage data, files and SQL workbooks and perform administrative tasks. Workbooks provides an environment for querying and visualizing your data. I will be using the Quick Start Guide workbook to get started. For those of you who have used Kinetica in the past and are logging back in, make sure to refresh the examples before you open the Quick Start Guide workbook so you get the latest version that is configured for ChatGPT.
The Quick Start Guide workbook uses the New York City taxi data to show Kinetica’s analytical capabilities. Run all the SQL query blocks in the “1. Load the data” worksheet. The two tables we are interested in for this tutorial are:
- The taxi trip data (“taxi_data_historical”) that contains information about taxi trips.
- The spatial boundaries of different neighborhoods in New York City (“nyct2020”).

Step 3: Try out a Sample Prompt in the ChatGPT Sheet
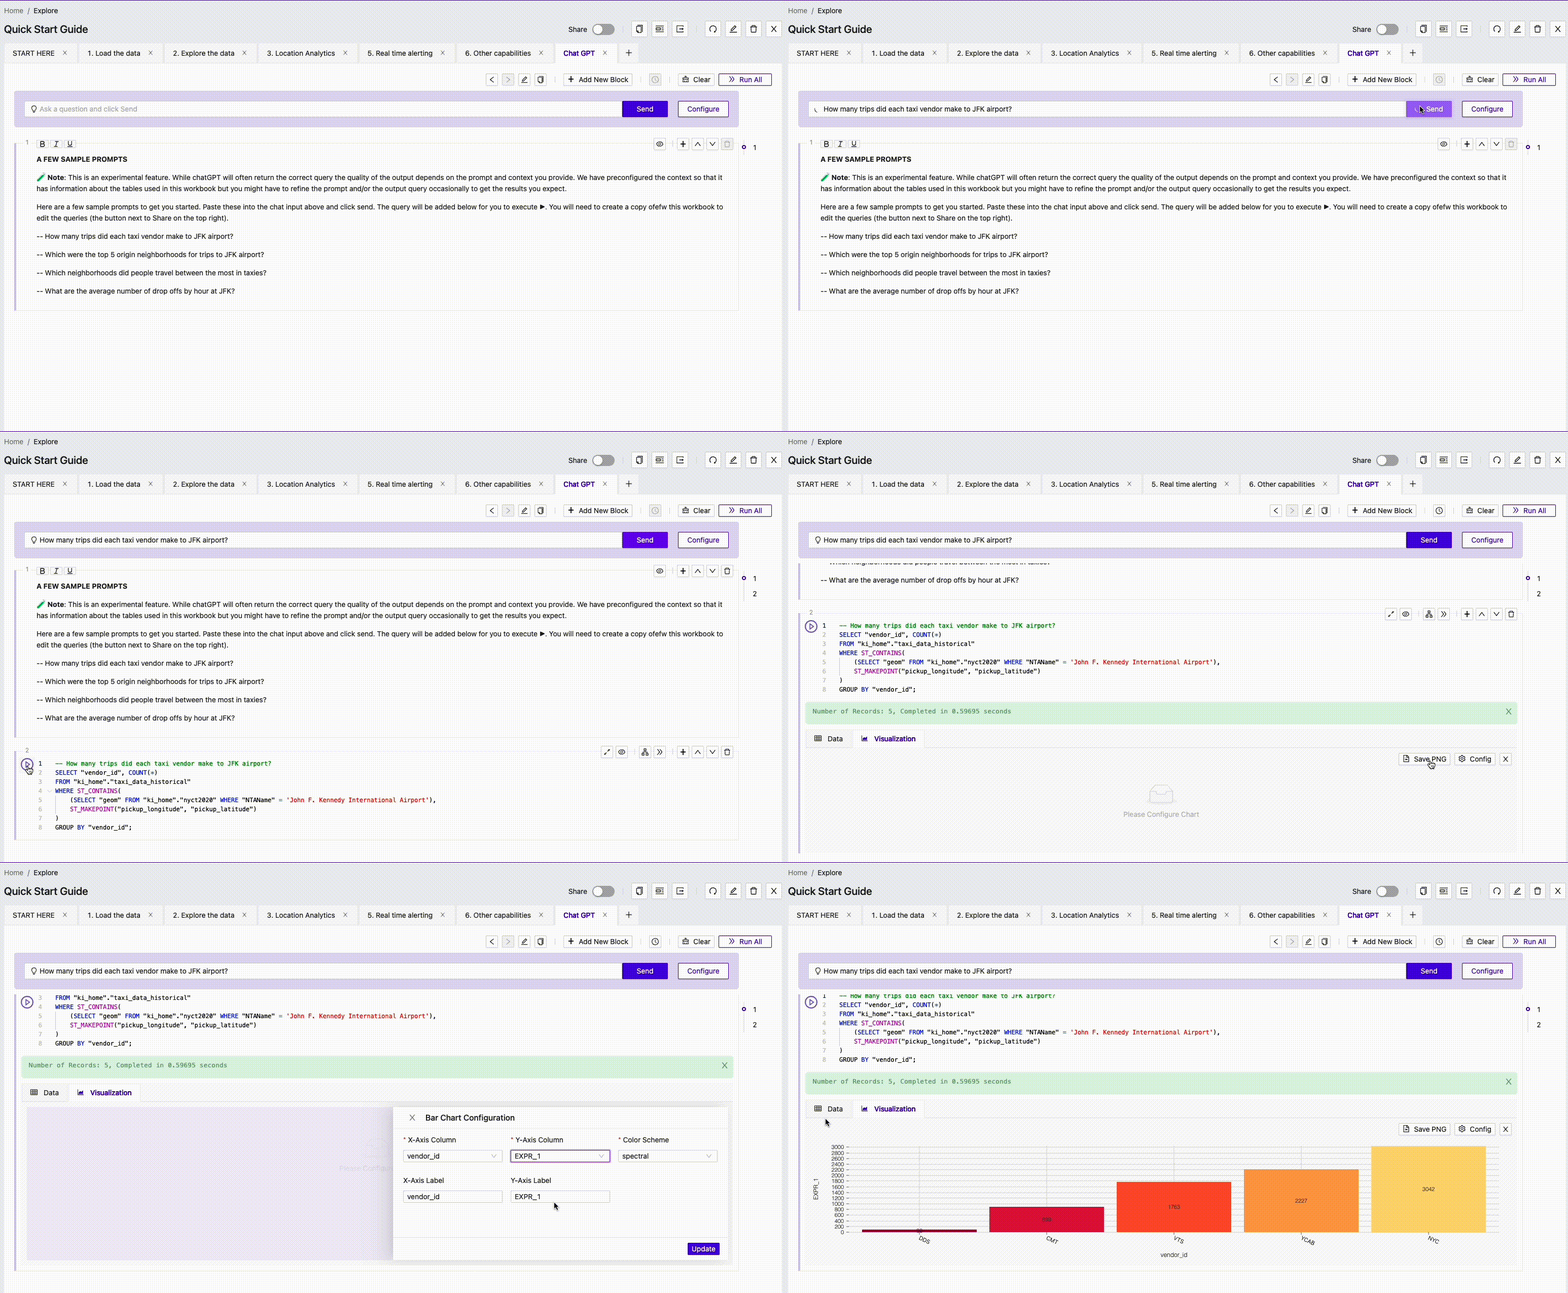
All workbooks in Kinetica now have a chat prompt. You can use this prompt to send analytical questions in plain English to ChatGPT. This will return a SQL query that references data in Kinetica, which is added as an executable code block to your worksheet.

In the instance above, we have asked GPT to identify the total taxi drop-offs by each vendor to JFK airport in New York City. It returns a query that
- Identifies the spatial boundary for JFK airport using the nyct2020 table.
- Filters all the records where the drop-off longitude and latitude from the taxi trip data was contained within the spatial boundary for JFK airport identified in Step 1.
- Summarizes the total trip by the vendor ID to calculate the drop-offs at JFK airport.
SELECT "vendor_id", COUNT(*) AS num_trips
FROM "taxi_data_historical"
WHERE ST_CONTAINS(
    (SELECT "geom" FROM "nyct2020" WHERE "NTAName" = 'John F. Kennedy International Airport'),
    ST_MAKEPOINT("dropoff_longitude", "dropoff_latitude")
)
GROUP BY "vendor_id"
This is not a simple query to execute, particularly on billion-row datasets. But because Kinetica has a highly performant vectorized query engine, it can execute these ad hoc queries on large amounts of data without any additional setup or pre-processing of the data. Head over to the “ChatGPT” worksheet to try out a few of the sample prompts listed there.
Step 4: Configure Chat Context
There are a few things to keep in mind when using the chat feature. The first is that we need to provide ChatGPT with enough context about the data so that it can generate queries that are specific to the tables inside Kinetica. We can do this by configuring the chat context.
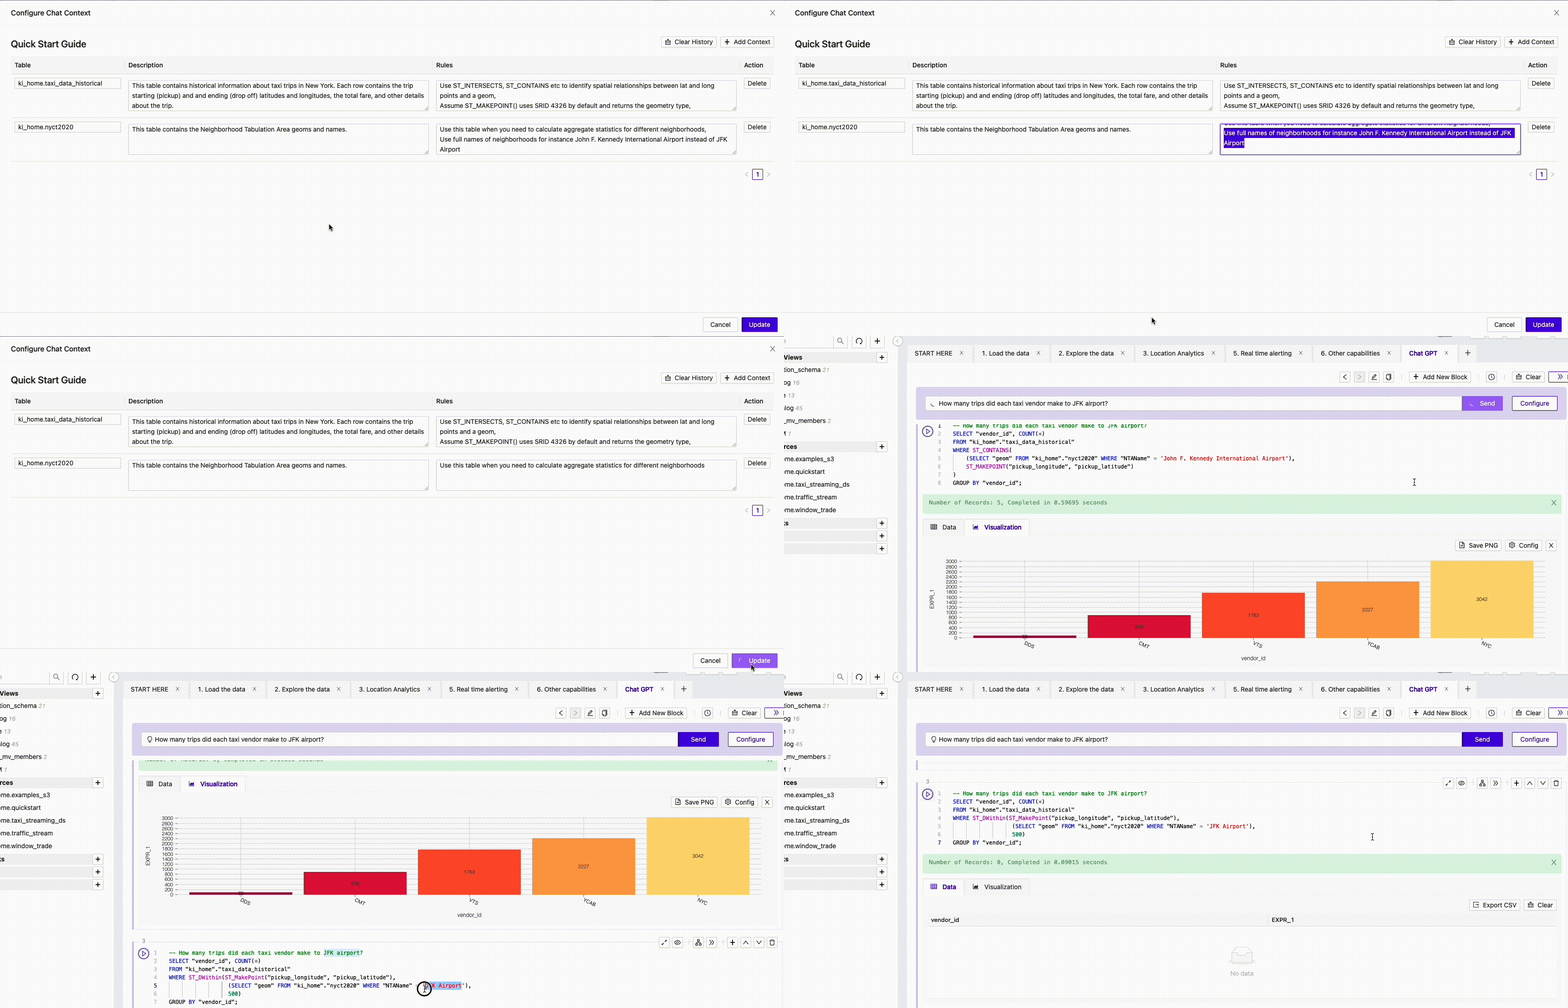
The first part of the configuration describes the tables in plain English. The Quick Start Guide already includes this configuration, but if you want to try it yourself with your own data or a different table, you will need to configure the context yourself. Here I am describing the taxi trip and neighborhoods table that we queried just now. Behind the scenes, Kinetica also provides GPT with the data definition for each table. The data definition language (DDL) taken together with the description here provides enough context to GPT for it to generate meaningful queries that are specific to the data. Note that Kinetica does not send any data to ChatGPT, only metadata about the tables (DDL), such as column names and types.

In addition to describing the tables, we can also specify comma-separated rules. Rules are a way to further refine query outputs from ChatGPT. These can include things that are specific to Kinetica or your own preferences for how the queries should be constructed.
In my experience, the best way to configure rules is by trial and error. Try out a few different prompts and examine the queries that are returned. If you notice that something could be improved, then add that as a rule.
For instance, if we delete the rule that asks GPT to use full names of neighborhoods and rerun the same prompt we provided it earlier, we will get a slightly different query with a shortened version of the name “JFK airport” instead of “John F. Kennedy airport.” This query will run, but it will not yield the expected result because a neighborhood with this shortened name does not exist in the nyct2020 table.

Step 5: Create Your Own Workbooks, Load Your Own Data and Write Your Own Prompts
Now you can start writing your own prompts to query your data. Create a workbook using the plus icon on the workbook tab. Use the import tab at the top of the page (next to Explore) to connect to hundreds of different data sources and load data from them into Kinetica.
Be sure to configure your chat so that ChatGPT knows about the DDL for the tables you plan to query.
Writing Prompts Is More an Art Than a Science
As with human conversations, there is some variability in the responses that we get from ChatGPT. The same prompts with the same context could yield different results. Similarly, prompts with slightly altered wording can change the SQL query that ChatGPT returns.
So make sure to check the queries generated to ensure that they make sense and that the results are what you expected.
Try It out for Free
This workbook is now available as a featured example that you can access for free using Kinetica Cloud. It takes just a few minutes to create an account and launch Kinetica. Go ahead and give it a whirl.
Making Sense of Sensor Data

