Kinetica with JupyterLab Tutorial
Introduction
JupyterLab is an integrated environment that can streamline the development of Python code and Machine Learning (ML) models in Kinetica. With it you can edit Jupyter notebooks that integrate code execution, debugging, documentation, and visualization in a single document that can be consumed by multiple audiences.
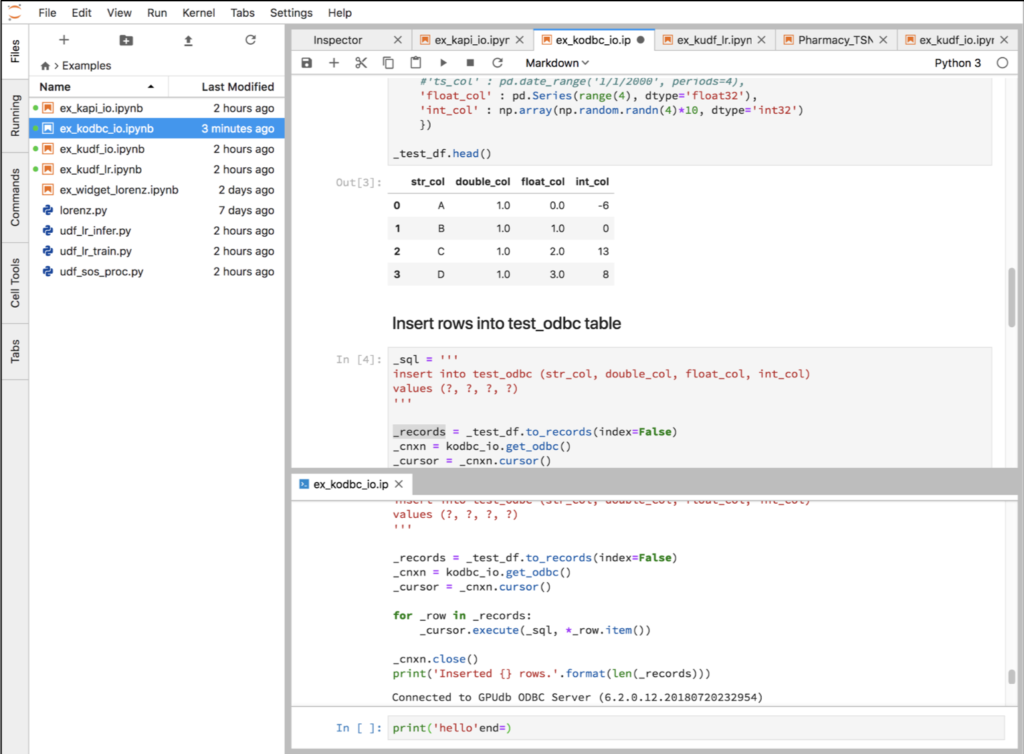
The development process is streamlined because sections of code (or cells) can be run iteratively while updating results and graphs. It can be accessed from a web browser and supports a Python console with tab completions, tooltips, and visual output. One of the difficulties of using Jupyter notebooks with Kinetica had been that an environment needs to be installed with all the necessary dependencies. In this tutorial we will simplify this process with a Docker image that integrates the components so they can run locally on any Intel-based machine.
The image integrates the following major components:
- CentOS 7
- Kinetica 6.2
- JupyterLab
- Python 3.6
The Python environment has the necessary modules for:
- Interaction with Kinetica using ODBC or the native API
- Creating and executing Kinetica UDFs
- Execution of ML Models on Kinetica (e.g. Pandas, PyTorch, TensorFlow)
Prerequisites
If you don’t already have Docker you can download it from the Docker store:
Get the Mac version here:
https://store.docker.com/editions/community/docker-ce-desktop-mac
Get the Windows version here:
https://store.docker.com/editions/community/docker-ce-desktop-windows
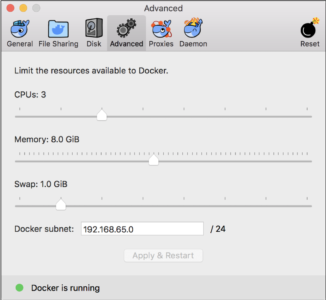
After installing, select the Advanced preferences and allocate at least 6GB of memory for the VM as shown below.
You will also need a trial license key for Kinetica that can be obtained from https://archive.kinetica.com/trial/.
kinetica-jupyterlab Contents
All the required code is available in the kinetica-jupyterlab Git repository:
You can use git clone to fetch a local copy.
[~/kinetica-jupyterlab (master)]$ git clone https://chadjk@github.com/kineticadb/kinetica-jupyterlab.git
[~/kinetica-jupyterlab (master)]$ ls -l
total 16
-rw-r--r--@ 1 chadjuliano  staff  5809 Jul 25 14:33 README.md
drwxr-xr-x  8 chadjuliano  staff   256 Jul 25 13:58 docker
drwxr-xr-x  8 chadjuliano  staff   256 Jul 25 14:03 notebooks
The kinetica-jupyterlab/docker directory contains the scripts necessary to build and run the Docker image. The docker/share directory will be mounted as a volume in the image and contains configuration and persist data.
[~/kinetica-jupyterlab/docker (master)]$ ls -l
total 1311672
-rw-r--r--  1 chadjuliano  staff       2366 Jul 24 11:21 Dockerfile-jupyterlab-6.x
drwxr-xr-x  7 chadjuliano  staff        224 Jul 24 11:18 config
-rw-r--r--  1 chadjuliano  staff        551 Jul 24 11:20 docker-compose.yml
drwxr-xr-x  6 chadjuliano  staff        192 Jul 25 13:58 share
The kinetica-jupyterlab/notebooks directory contains notebooks and Python scripts needed to run them. This directory will also be mounted inside the image and its contents will be visible in JupyterLab.
[~/kinetica-jupyterlab/notebooks (master)]$ ls -l
total 0
drwxr-xr-x   5 chadjuliano  staff  160 Jul  6 21:56 Autoencoder
drwxr-xr-x  14 chadjuliano  staff  448 Jul 25 16:33 Examples
drwxr-xr-x   9 chadjuliano  staff  288 Jul 25 13:48 KJIO
drwxr-xr-x  13 chadjuliano  staff  416 Jul  9 09:32 SVD
drwxr-xr-x   8 chadjuliano  staff  256 Jul 24 18:42 UDF
In the kinetica-jupyterlab/notebooks/Examples directory are notebooks that demonstrate connectivity with Kinetica. Each is an interactive tutorial with its own documentation summarized below.
[table id=1 /]
The focus of this tutorial is to get you up and running with the Docker image so you can start exploring the notebooks. There may be follow up tutorials based on this environment to demonstrate more sophisticated ML use cases.
Pulling the Image
In this section we will use docker-compose to pull the kinetica/kinetica-jupyterlab image from DockerHub.
Open a shell to the Docker directory and invoke docker-compose pull. This will download about 7GB of data so make sure you have a solid internet connection.
[~/kinetica-jupyterlab (master)]$ cd docker/
[~/kinetica-jupyterlab/docker (master)]$ docker-compose pull
Pulling gpudb ... done
You can use the docker image command below to confirm your image was downloaded successfully.
[~/kinetica-jupyterlab/docker (master)]$ docker image list

REPOSITORY                      TAG              IMAGE ID              CREATED                     SIZE

kinetica/kinetica-jupyterlab    6.2              e9702b6e31fb          28 minutes ago              7.35GB

centos                          7                49f7960eb7e4          7 weeks ago                 200MB
Entering Your License Key
At this point you should have a Kinetica license key. If you do not already have a key, you can get one at https://archive.kinetica.com/trial/.
# The license key to authorize running.
license_key = {your key}
The database is configured to start automatically, but for this to succeed a license key must be configured. Edit docker/share/conf/gpudb.conf, uncomment the line with license_key and add your key.
Starting the Container
This tutorial uses docker-compose to manage the parameters of the container which can simplify things because all the settings are in the docker-compose.yml file.
Run the below docker-compose up command to start the image. The combined log output of Kinetica and JupyterLab will be displayed in the console. This console needs to be open for as long as the container is running.
[~/kinetica-jupyterlab/docker (master)]$ docker-compose up
Creating network "docker_default" with the default driver
Creating gpudb-jupyterlab-6.x ... done
Attaching to gpudb-jupyterlab-6.x
[...]
gpudb-jupyterlab-6.x | 2018-07-25 23:45:04.516 INFO  (2494,5923,r0/gpudb_sl_shtbl ) d0a1758a319b Utils/GaiaHTTPUtils.h:161 - JobId:1011; call_gaia_internal endpoint: /show/table completed in: 0.00193 s
If you want a bash prompt in the container, open up another console and run the below command.
[~/kinetica-jupyterlab/docker (master)]$ docker-compose exec gpudb /bin/bash
[root@d0a1758a319b ~]# su - gpudb
Last login: Wed Jul 25 23:44:11 UTC 2018
[gpudb@d0a1758a319b ~]$
To stop the container, use the docker-compose down command.
[~/kinetica-jupyterlab/docker (master)]$ docker-compose down
Stopping gpudb-jupyterlab-6.x ... done
Removing gpudb-jupyterlab-6.x ... done
Removing network docker_default
Exploring the Environment
To access to GAdmin open URL http://localhost:8080 and use login admin/admin.
To access JupyterLab open http://localhost:8888 and enter password kinetica. When you login you will see file browser on the left.
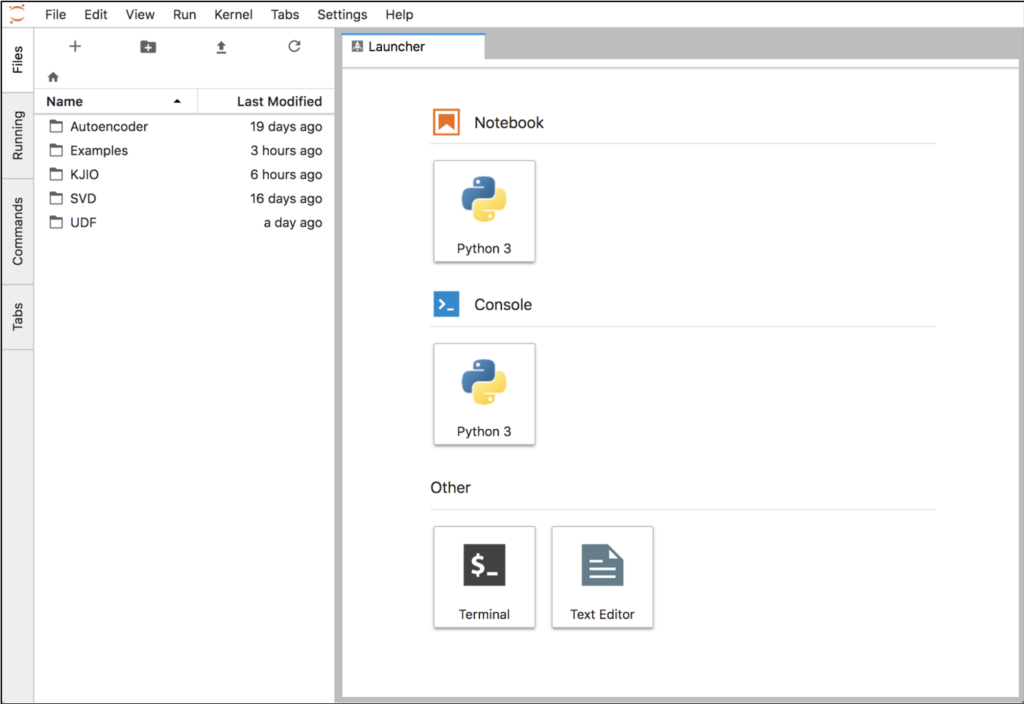
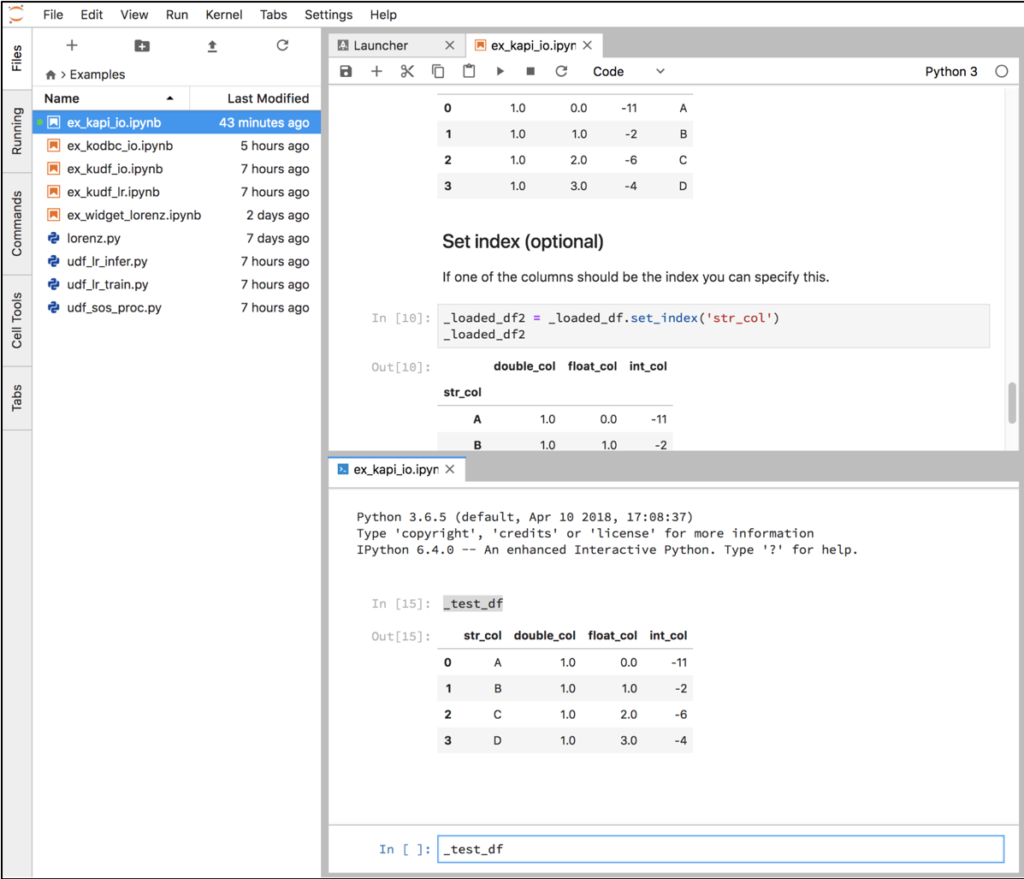
Navigate to the Examples folder and open notebook ex_kapi_io.ipynb. This notebook demonstrates basic interactions between Pandas dataframes and Kinetica via the functions in the KIJO module.
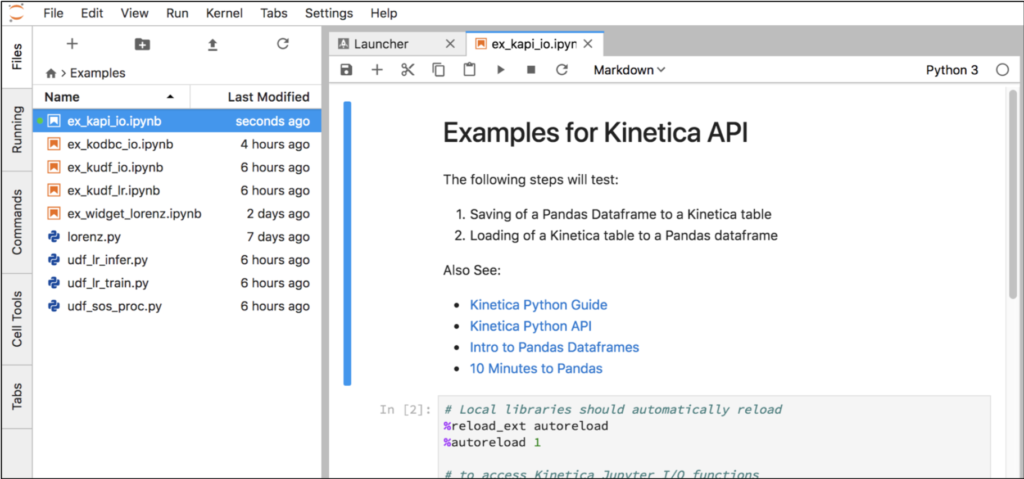
Select Kernel->Restart Kernel and Run All Cells… to clear the outputs. Then select the first cell and click the Play button to run each cell. Each notebook has a separate Python process or kernel that remembers the variables that were created when cells were executed. You can modify and re-execute any cell without starting from the beginning.
You can also open a Python console attached to the same kernel as a notebook. Right click on a cell and select New Console For Notebook. Enter one of the variables executed from the notebook (e.g. _test_df) and then press Shift+Enter to see the contents in the console.
Conclusion
The JupyterLab environment integrates many components. With it you can ingest an external data source, analyze it with some of the most powerful ML libraries, save the results to Kinetica, execute UDFs, and visualize the data all in a single notebook. You can add documentation and equations so your use case can tell a story to multiple audiences.
We hope you find this environment easy to use and productive for developing new use cases on the Kinetica platform. If you have any problems or questions please contact Chad Juliano <cjuliano@archive.kinetica.com>.
As a next step you can run through the other example notebooks. Additional online resources are available here:
- Project Jupyter Home
- 28 Jupyter Notebook tips, tricks, and shortcuts
- JupyterLab Documentation
- IPython Documentation
Chad is a Principal Consultant at Kinetica.
Making Sense of Sensor Data

